Friday, February 27, 2009

archived: oh how i heart knitting


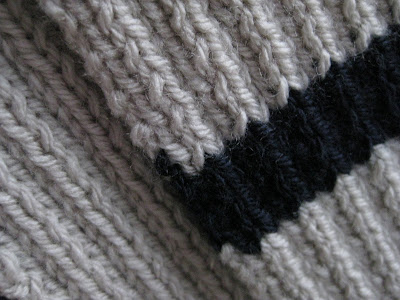
This is my first completed knitting project. I'm so proud of myself and so in LOVE with knitting. Its my new favorite thing. I want to do it ALL THE TIME. This is a 2 knit 2 purl scarf from the book Stitch 'n Bitch.

I've found that is my favorite book to learn knitting from. I really like how she presents everything and she is sassy - which I love. I also have enjoyed some of the patterns and photos from The Chicks with Sticks Guide to Knitting. I heart the library. Can you tell??


I used Vanna's Choice acrylic yarn...not very beautiful but good and cheap for a beginner. I was proud of myself...I didn't make one mistake UNTIL the fourth to the last row. I must have dropped a stitch and I didn't notice it until after I bound off. There is now a little hole... you can see it in the lower right corner in the top photo. I could probably go back and unravel and fix it, but I was really ready to be done with this scarf - it is 64 inches long!


Here it is on my model. (before I weaved the ends in...) Isn't he cute?? This will be mailed off today for a birthday gift. I'm starting to realize I need to begin making things for myself!

Already have something new on the needles...
(not ready for any increasing or decreasing or oh man IN THE ROUND... so i'm sticking with the flat square-ish stuff for now)

Monday, February 23, 2009

archived: baby booties


hello long lost friends. i think this is the longest i've gone without posting in a while! i just wasn't really feelin' it. and i've decided that with things like this blog and crafting its supposed to be fun so i should only do it if i really want to. i've also been spending hours upon hours studying pharmacology. shoot.me.now. i'm failing my class and that is not acceptable so things needed to change. all the studying has produced very little crafting time. in spite of that, my new crafty love affair with knitting is growing more and more intense. more on that later this week.

ok. the booties. i HATED making these (pattern at this link). good cause . had to do it, but for real sewing small things is NOT fun at all. sewing the casing for the ribbon produced SO MUCH profanity that on the second pair I just sewed the ribbon on the outside.


i do find them incredibly adorable now that i have had two days to stop hating them. they are very tiny and cute. grant loves them which is very endearing. he loves anything i make which is also very endearing.


don't look too close...there might be a seam coming loose in there somewhere...

Tuesday, February 17, 2009

wedding posts/info


i've archived *most* of my wedding blog posts on this blog, but if you are looking for more - every last one can be found here

Tuesday, February 10, 2009

archived: princess wand


its been a rough go at things lately, but what better way to make a day brighter than a princess wand??

a little gift for a special birthday girl

i found it here

Thursday, February 5, 2009

archived: pillowcase bag - a sort of tutorial


Yesterday, on a whim, I set out to make the pillowcase bag that I included in my Crafty To Do List. Martha has lots of great ideas, but her instructions leave something to be desired. I decided to take a few pictures and videos to make it easier for anyone else who wants to make one. It is really quite easy and took me about 45 minutes start to finish.


Start with a pretty pillowcase spread out flat on your cutting mat. Cut 1/4 inch off the bottom (the closed end)


Next you are going to cut the pillowcase in half diagonally - doesn't matter which diagonal, just pick one.


This is the part that kind of confused me. You are going to fold over and pin the 4 diagonal cut edges. Martha suggests a double fold of 1/4 inch, but that is too difficult and not really necessary so I just did one fold of about 1/2 inch. You can see two of my edges in the above picture and I did the same thing to the diagonal edges of the other half.


Sew all four hems. Again you are sewing the diagonal edges here.


After all four edges are hemmed you are going to place one half inside the other. This is sort of confusing so here is a video to assist.


is that clear? i hope so.


As I mentioned in the video you are now going to sew along the outside diagonal edges. This will rejoin the two halves. You can see above that the two are joined. You have to do this once on the front of the bag and again on the back outside diagonal edge.


This video reinforces the previous step and also the last few steps. 1. Turn the bag inside out and sew along the bottom - this closes up the bottom of the bag so your stuff doesn't fall out! 2. Turn it right side out again and knot the top.


Go places with your new bag! I think this turned out cute, but I'm not as in love as I'd hoped to be. Jess suggested some ric-rac...what do you guys think??